MTM ACR4-18 Easy Remove
F16v4 + v4Expansion
Murphy Inc is the official supplier of Jdeation Mounting Kits
Mounting kits can be purchased which include exact mounting plates and hardware required for this design.
Step 1: Print / Verify Your Design
Fabricated designs are non refundable. Print your design to scale on your paper printer to ensure the holes line up properly for your components.
Instructions for printing your design to scale:
http://www.jdeation.com/site/faq
Step 2: Visit Murphy Inc. Store
Make sure you enter your Design ID when adding materials to your cart.
This Design ID is: 5JE09TJK

Components in Design
Mounting Hardware Required (Details)
- 16x - #8 K Lock Nut
- 20x - #8 Washer
- 4x - #6 Self Tapping 1/2 in
- 4x - #8 3 in Bolt
- 8x - 3 in Spacer
- 8x - M4 PS Screw
- 4x - Universal Bracket
- 4x - #8 4 in Bolt
- 8x - 4-40 Standoff
- 8x - 4-40 K Lock Nut
- 8x - 4-40 PCB Screw
About This Design
With this design you can swap a power supply without removing the plate - thats special!
If you have ever had a power supply fail mid season you know how much of a pain it is to replace with a traditional mounting plate. With our Easy Remove PS design you can swap a power supply in under 30 seconds without removing the top or bottom plates. Now that is special.
Plus with double decker component shelves, you can fit multiple full size controllers
Features
- Fits multiple power supplies stacked on top of each other
- Easy remove power supply design allows for power supply swaps in under 30 seconds
- Double decker component deck allows for tons of components
- Fully customizable component holes using the JDeation Designer
- Perfectly matched to mount to a MTM ACR4-18 Enclosure
- Top plate has wire access on 2 sides
- Bottom Plate Dimensions: 12.7in x 8.6in
Jdeation Featured Design
Design ID : 5JE09TJK
Designer : jchancel
Processing Design Layers...
Your design will start downloading in one moment.

Hint:
To paper print a design, download as a PDF and follow THESE instructions.
Murphy Inc is the official supplier of Jdeation Mounting Kits
Mounting kits can be purchased which include exact mounting plates and hardware required for this design.
Step 1: Print / Verify Your Design
Fabricated designs are non refundable. Print your design to scale on your paper printer to ensure the holes line up properly for your components.
Instructions for printing your design to scale:
http://www.jdeation.com/site/faq
Step 2: Visit Murphy Inc. Store
Make sure you enter your Design ID when adding materials to your cart.
This Design ID is: 5JE09TJK
Components in Design
Mounting Hardware Required (Details)
- 16x - #8 K Lock Nut
- 20x - #8 Washer
- 4x - #6 Self Tapping 1/2 in
- 4x - #8 3 in Bolt
- 8x - 3 in Spacer
- 8x - M4 PS Screw
- 4x - Universal Bracket
- 4x - #8 4 in Bolt
- 8x - 4-40 Standoff
- 8x - 4-40 K Lock Nut
- 8x - 4-40 PCB Screw
Works With (Sold Seperately)

Featured Design Variations

 Download
Processing Design Layers...
Your design will start downloading in one moment.
Hint:
To paper print a design, download as a PDF and follow THESE instructions.
 Edit
View Design
Edit
View Design

Processing Design Layers...
Your design will start downloading in one moment.
Hint:
To paper print a design, download as a PDF and follow THESE instructions.
Edit
View Design

Processing Design Layers...
Your design will start downloading in one moment.
Hint:
To paper print a design, download as a PDF and follow THESE instructions.
Edit
View Design

Processing Design Layers...
Your design will start downloading in one moment.
Hint:
To paper print a design, download as a PDF and follow THESE instructions.
Edit
View Design

Processing Design Layers...
Your design will start downloading in one moment.
Hint:
To paper print a design, download as a PDF and follow THESE instructions.
Edit
View Design
DIY Build & Assembly Instructions
Assembly instructions for - MTM ACR4-18 Easy Remove
All of the JDeation designs are customizable using the JDeation Designer
View our detailed walkthrough video for instructions on how to use the JDeation Designer
The following pieces of hardware are required for assembly of Mounting Plate.
Most parts are available at home depot - all are available online.
- Qty: 16 - #8 K Lock Nut
- Qty: 20 - #8 Washer
- Qty: 4 - #6 Self Tapping 1/2 in
- Qty: 4 - #8 3 in Bolt
- Qty: 8 - 3 in Spacer
- Qty: 8 - M4 PS Screw
- Qty: 4 - Universal Bracket
- Qty: 4 - #8 4 in Bolt
- Qty: 8 - 4-40 Standoff
- Qty: 8 - 4-40 K Lock Nut
- Qty: 8 - 4-40 PCB Screw
Our Kits Make it Easy
Kits include acrylic, hardware and power supply brackets. Cheaper than you can buy at big box stores.
The following plate fabrication instructions serve are general documentation for all mounting plate designs.
Step 1: Acquire Material
Acquire material to make your plates. Plastic or wood are good choices. The bellow instructions use 5mm plywood which was purchased from a local home depot. The material you choose MUST be 5mm or less in thickness.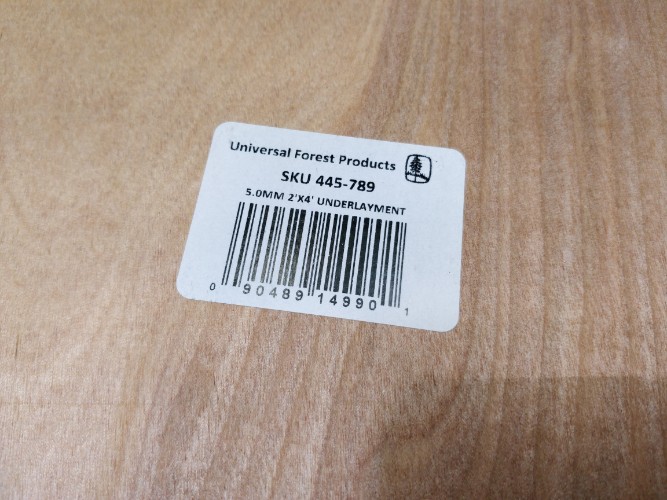
Step 2: Print Design To Scale
Print your design on your home paper printer to scale.
On your design, click the download button and select PDF (Print). You must open the PDF in Adobe Reader to get the advanced print functions. Do not open the PDF in your browser. From the Adobe Reader print dialog box, select the following options.
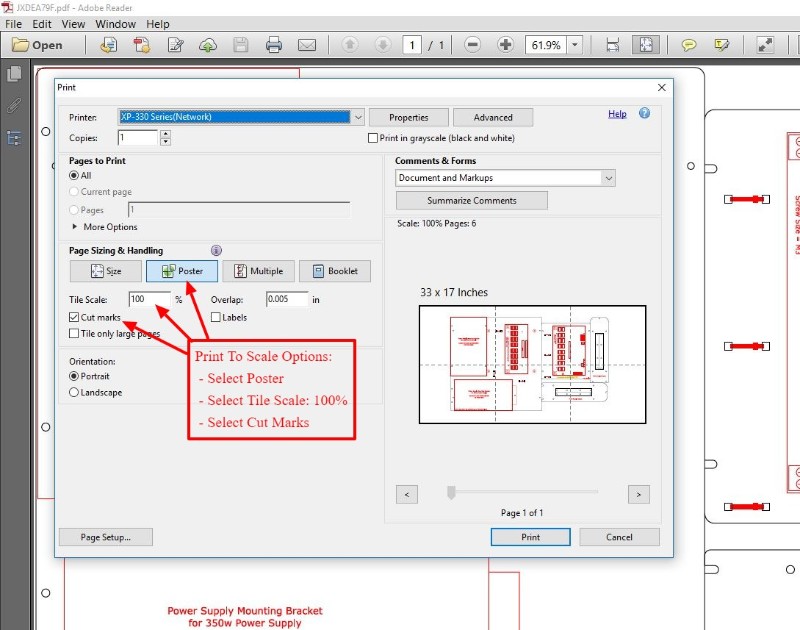
Image of design printed to scale:
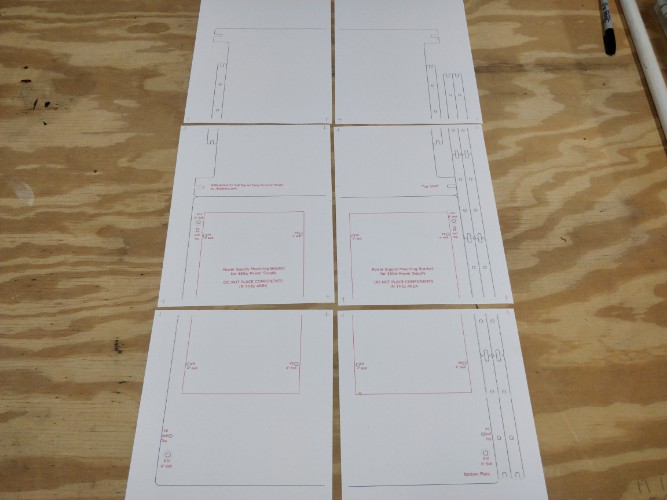
Step 3: Tape Design Together
Cut and Tape your designs together. Use the Adobe cross marks to align paper perfectly. It is important to spend time on this step and get alignment correct as a misaligned tape job will interfere with hole placements on layout.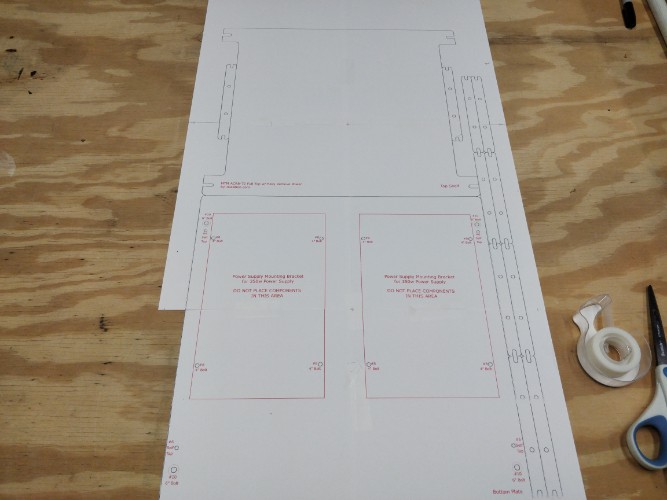
Step 4: Apply Glue
Apply Gluestick to back of paper. We have had good success with repositionable glue sticks.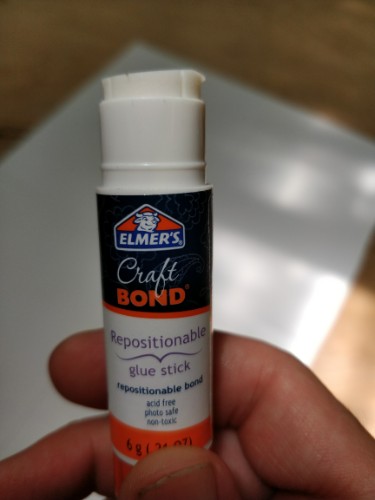
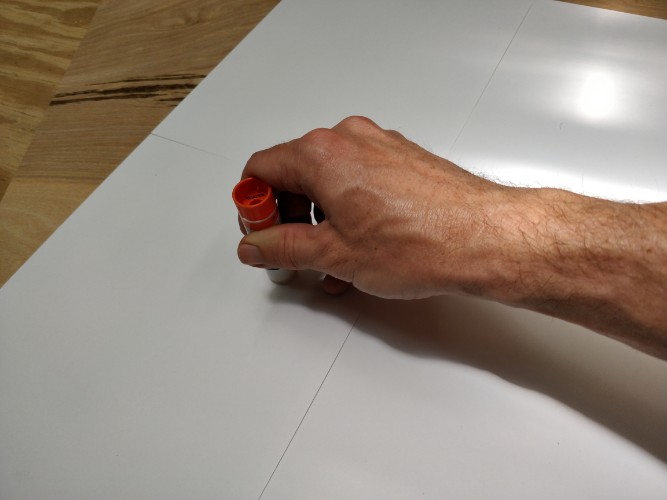
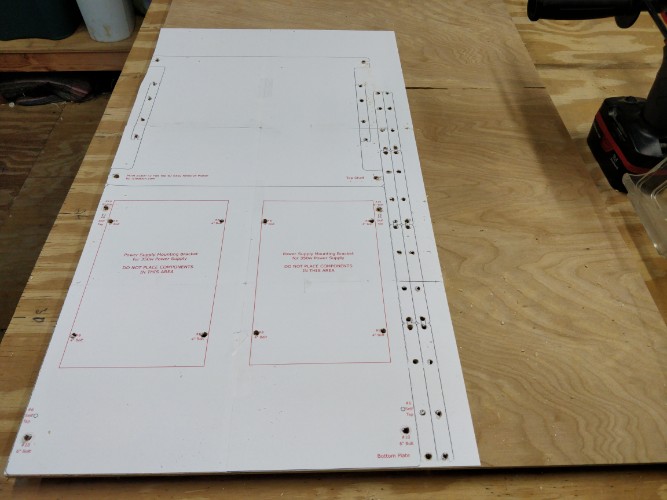
Step 5: Stick Design to Material
Apply paper design to wood. Line up two edges of design with two edges of wood if possible to reduce cutting.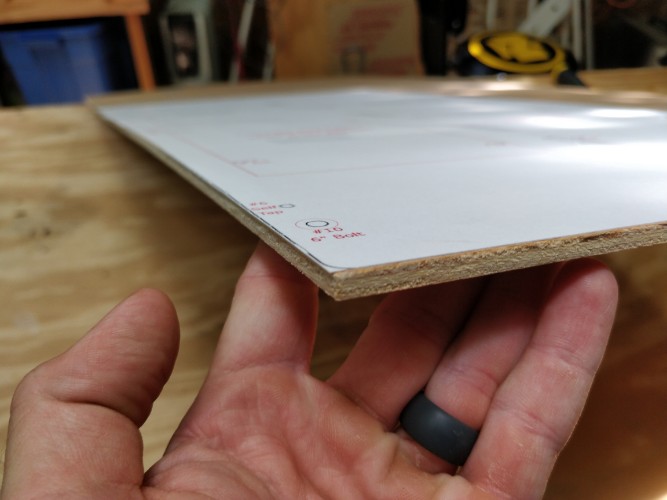
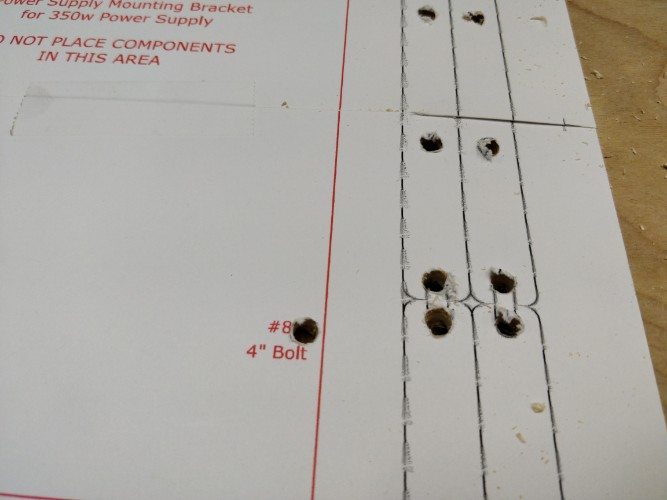
Step 6: Drill Holes
Drill the black circles on the design. The following size drill bits are recommended. Also while not necessary it is recommended to use a brad point drill bit as it allows greater precision due to its sharp point on tip.
| Screw Size | Drill Size | Typical uses |
|---|---|---|
| 4/40 | 1/8" | Component standoffs |
| #6 | 5/32" | Self tapping screws for mounting to enclosure |
| #8 | 3/16" | 3" and 4" Bolts for P.S. and Shelves |
| #10 | 7/32" | 6" Bolts for P.S. and Shelves |
NOTE: All Black lines on design are cut or drill lines. Red lines are just for helping create the design and for information useful to assembly
Step 7: Cut Out Design
Use a Jig Saw to cut out the straight black lines.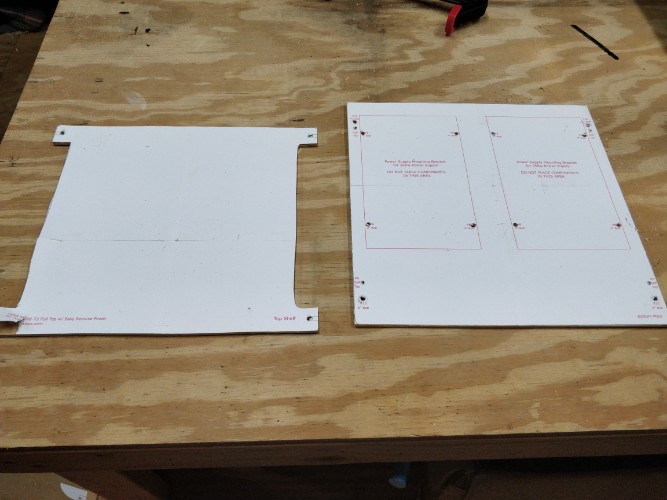
Our Kits Make it Easy
Kits include acrylic, hardware and power supply brackets. Cheaper than you can buy at big box stores.
The are 2 options for creating the necessary power supply brackets:
Option 1: 3D Print the Brackets
The best DIY option is to 3D print your brackets. Download the STL designs from Thingiverse.
Download Link => 3D Print JDeation Mounting Bracket - Thingiverse
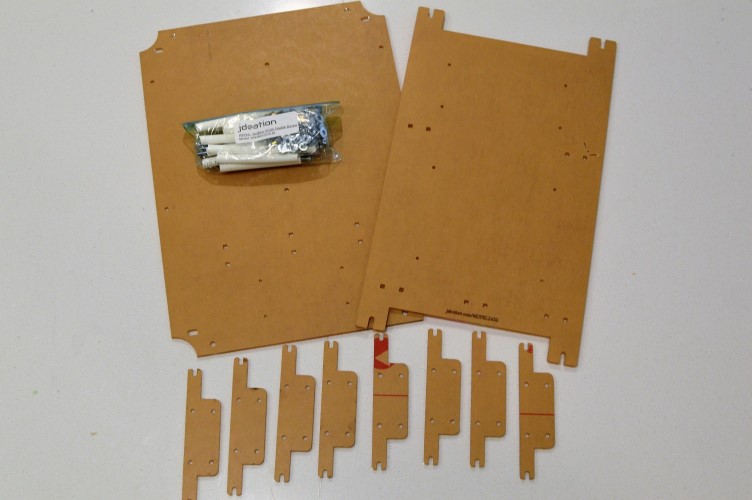
Option 2: Cut Mounting Brackets from Wood
Making from wood is a doable option but the small components make this the most difficult option. We recommend using a band saw with a fine tooth blade for these smaller parts.
Download Link => Download Mounting Bracket Cut Template
Our Kits Make it Easy
Kits include acrylic, hardware and power supply brackets. Cheaper than you can buy at big box stores.
Step 1: Remove Protective Film
Remove plastic or paper film from both sides of acrylic or wood. Its much easier to do this now than after assembly.
NOTE: Occasionally the fabrication process will remove one or both sides. If you can see through the acrylic clearly then the film is gone.

Step 2: Attach Power Supply To Bottom Plate
Depending on the design, power supplies are either attached via mounting brackets, or screwed directly to the bottom plate. If your design requires the power supplies to be screwed to the bottom plate, attach them now using M3 or M4 screws.
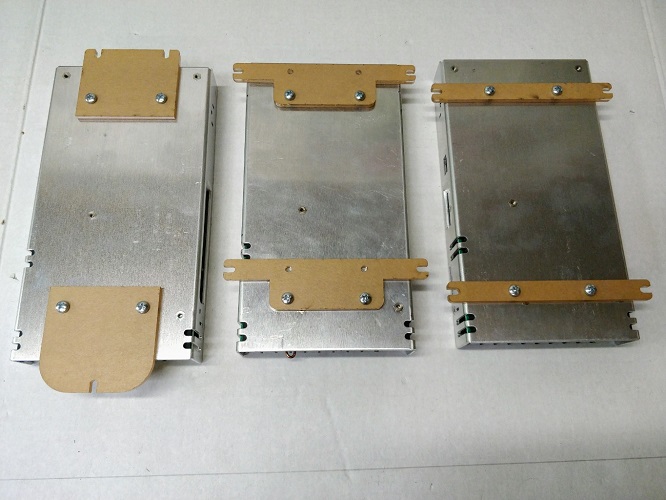
Step 2: Attach Power Supply Brackets
If your design requires the use of STACKED 350w Power Supplies, attach the mounting brackets to the bottom of your power supply using the 4mm screws and either horizontal or vertical mounting bracket
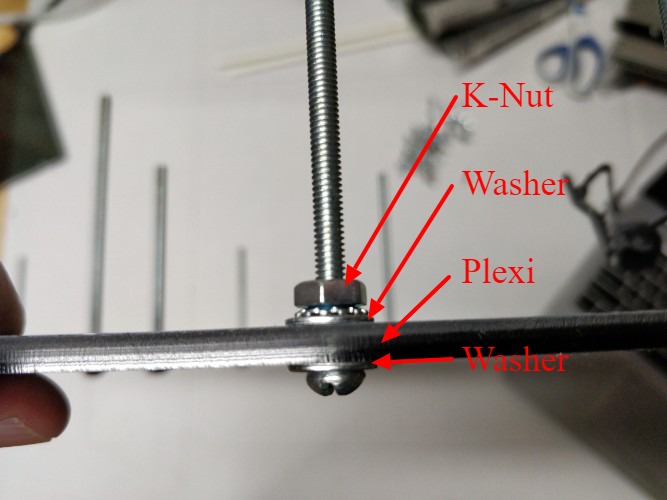
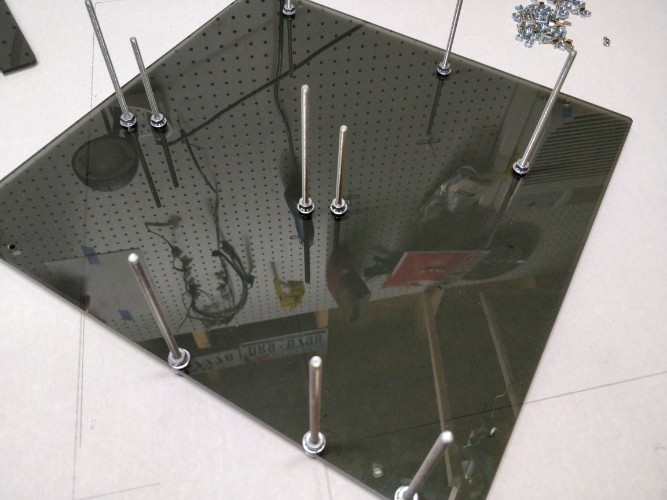
Step 3: Attach Bolts to Bottom Plate
Attach bolts. The MTMACR8-72 has both 4” inch and 3” bolts, but not all designs have both. These should be inserted in the largest holes on the plate. See diagram below for bolt / washer / nut ordering. NOTE: Refer to your online design to find appropriate holes.
WARNING: DO NOT OVERTIGHTEN
Step 4: Attach 4/40 Standoffs
Attach 4/40 standoffs and k-nuts to smallest holes. No washer is needed.
WARNING: DO NOT OVERTIGHTEN
Step 5: Attach Components
Attach components to the standoff. No washer is needed.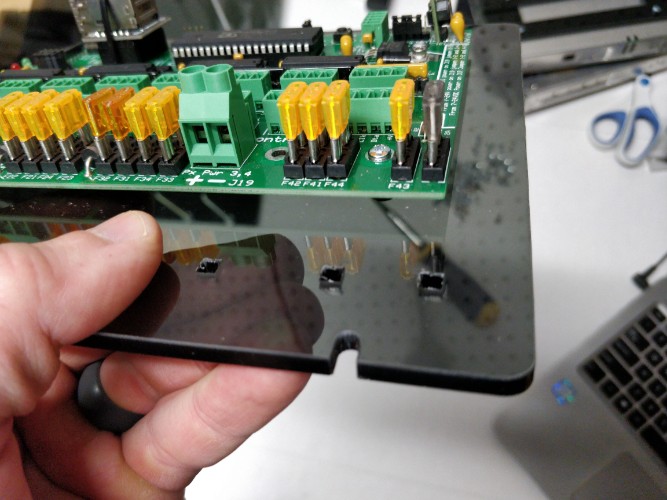
Step 6: Insert Plate into Enclosure
Use self tapping screws to attach mounting plate to the enclosure. Holes should be medium size and in each corner of the mounting plate.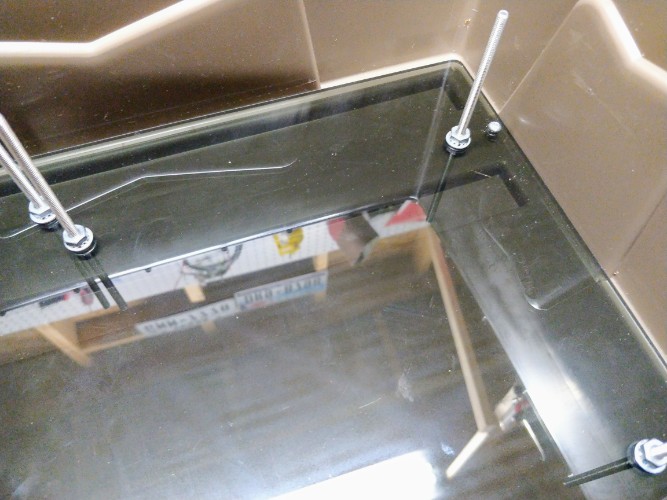
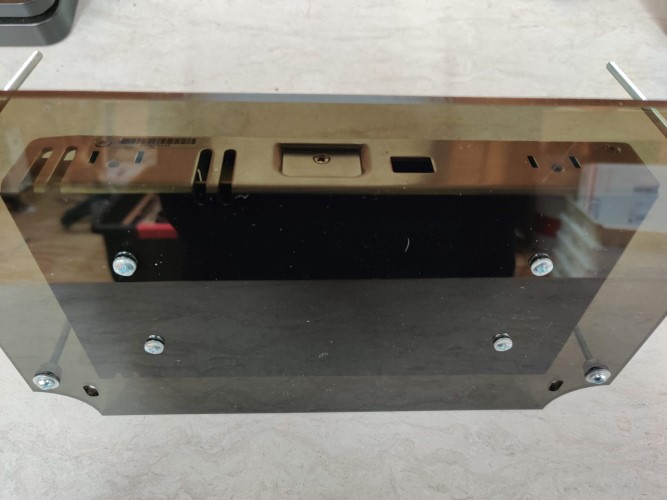
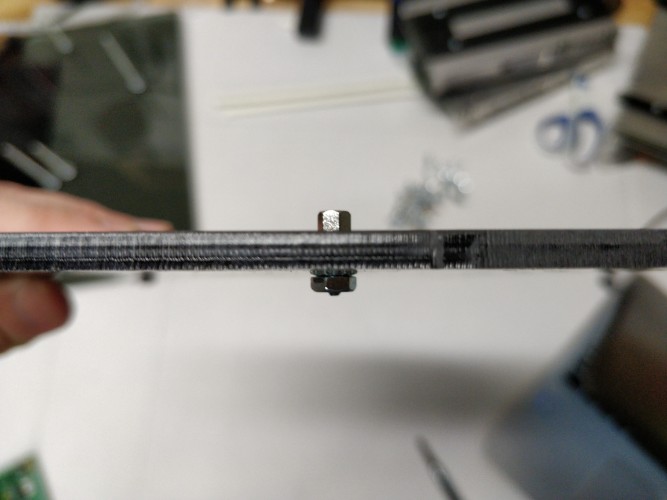
Step 7: Insert Power Supplies
If your design is using stackable power supplies or clamp style power supplies, insert the power supplies using the example pictures below as guides. See diagram below for spacer / nut ordering. You control the distance between the power supplies through how long you make your spacer. The spacers are held in place with a K-Nut. No washers needed.
Power supplies can be offset mount to allow easier access from above to the power supply wire connection screws.
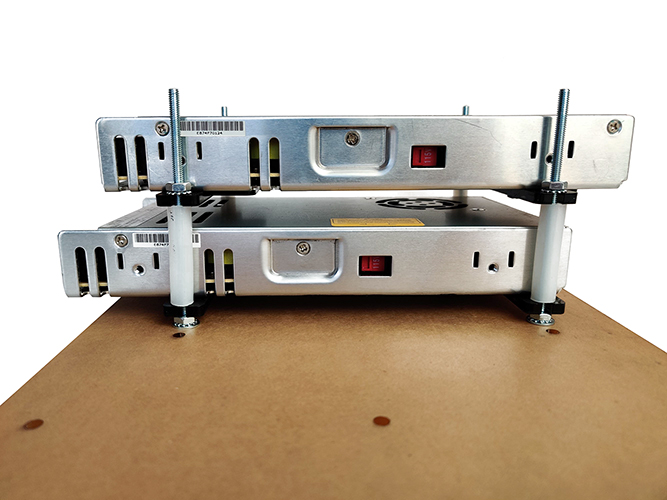
Works with both full size and slimline power supplies

Use clamp style mounts for power supplies that do not have mounting holes. Show is an HP Common Slot Power Supply. The mounting brackets essentially clamp the power supply in place.
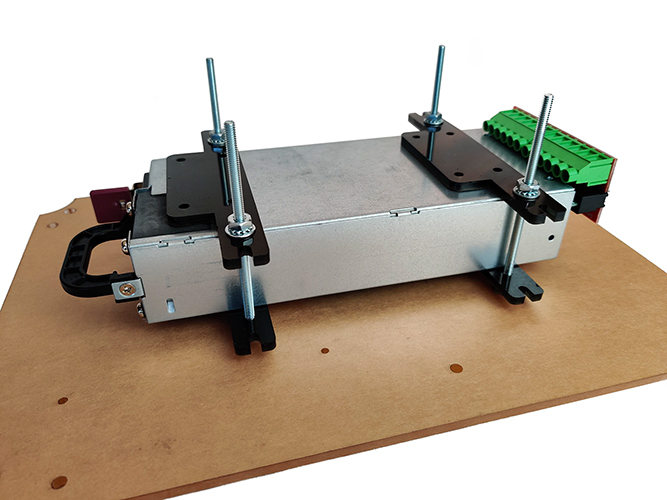
You can also add a spacer on top of the top power supply to make threading the nut on the bolt easier
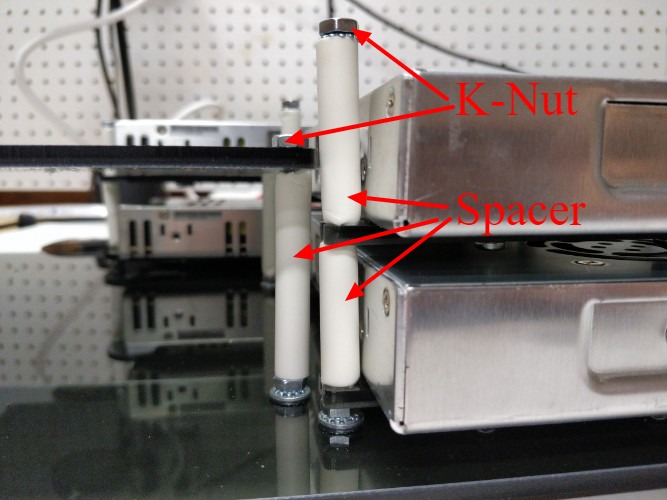
Step 8: Insert Upper Shelf
Insert upper shelf. Upper shelf sits directly on spacer and is attached with a K-Nut from the top. No washer is needed. You control the height of the second shelf by trimming the spacers. We recommend setting the height as high as possible to allow plenty of space for cable glands.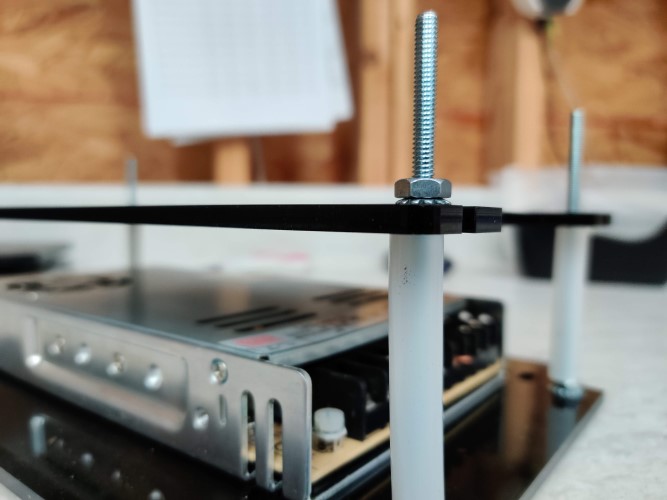
Step 9: Wire It Up
Wire it up and make it fancy.
Few tips:
- Don’t tin your wires if inserting them into a screw down clamp. Solder will expand slightly and loosen the clamp.
- Use fuse between power supplies and controllers. A lose connection could cause an arc and if unfused could damage your power supply or your controller and potentially cause a fire.
- Make sure you use appropriate guage wire for the amperage you plan on needing. Small guage wire on high loads can cause greater voltage loss and in extreme cases start a fire.
View our timelapse of a JDeation Enclosure being wired up.
Step 10: Post Your Pics
Post a picture of your killer new build to facebook - make sure you tag JDeation Designer!
Use our contact page if you require assistance with your build.
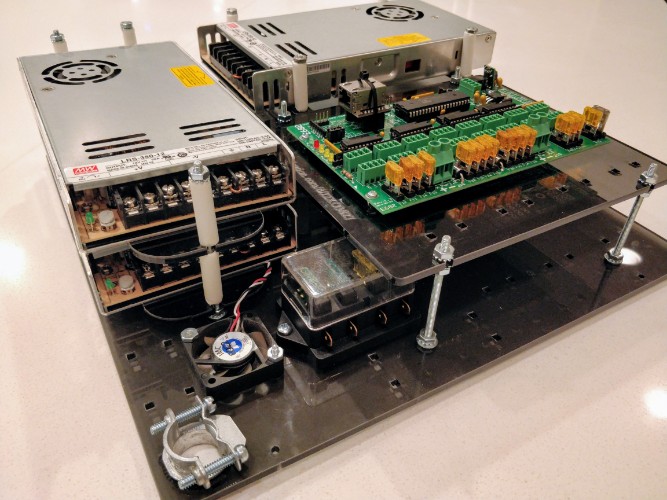
Finished Build (outside of case)
Finished Build with wood plates (outside of case)
